How to Host a WordPress Site on WebsiteHosting.app: A Step by Step Guide

Written by Fernando Raymond

I have been building blogs on WordPress since 2013, and every year the same question lands in my inbox: what is the easiest way to get a WordPress site online without wrestling with clunky control panels? That question is exactly why I built WebsiteHosting.app. In this short guide I will walk you through the whole thing, from logging in to a live managed WordPress site, using the real portal so you can see each step for yourself.
Before we start, if you are still weighing up your options and want to see how our managed WordPress hosting stacks up on price and speed against the big names, read my full breakdown here: The Best Managed WordPress Hosting Compared to Kinsta, WP Engine and Cloudways on Price, Speeds and More. My team and I tested each platform ourselves before writing it, so it gives you an honest picture of where WebsiteHosting.app sits.
1. Log in and get to know your dashboard
Everything starts at portal.websitehosting.app. Once you sign in you land on the Dashboard, which is a single view of your whole account. I designed this page so you never have to go hunting for anything.
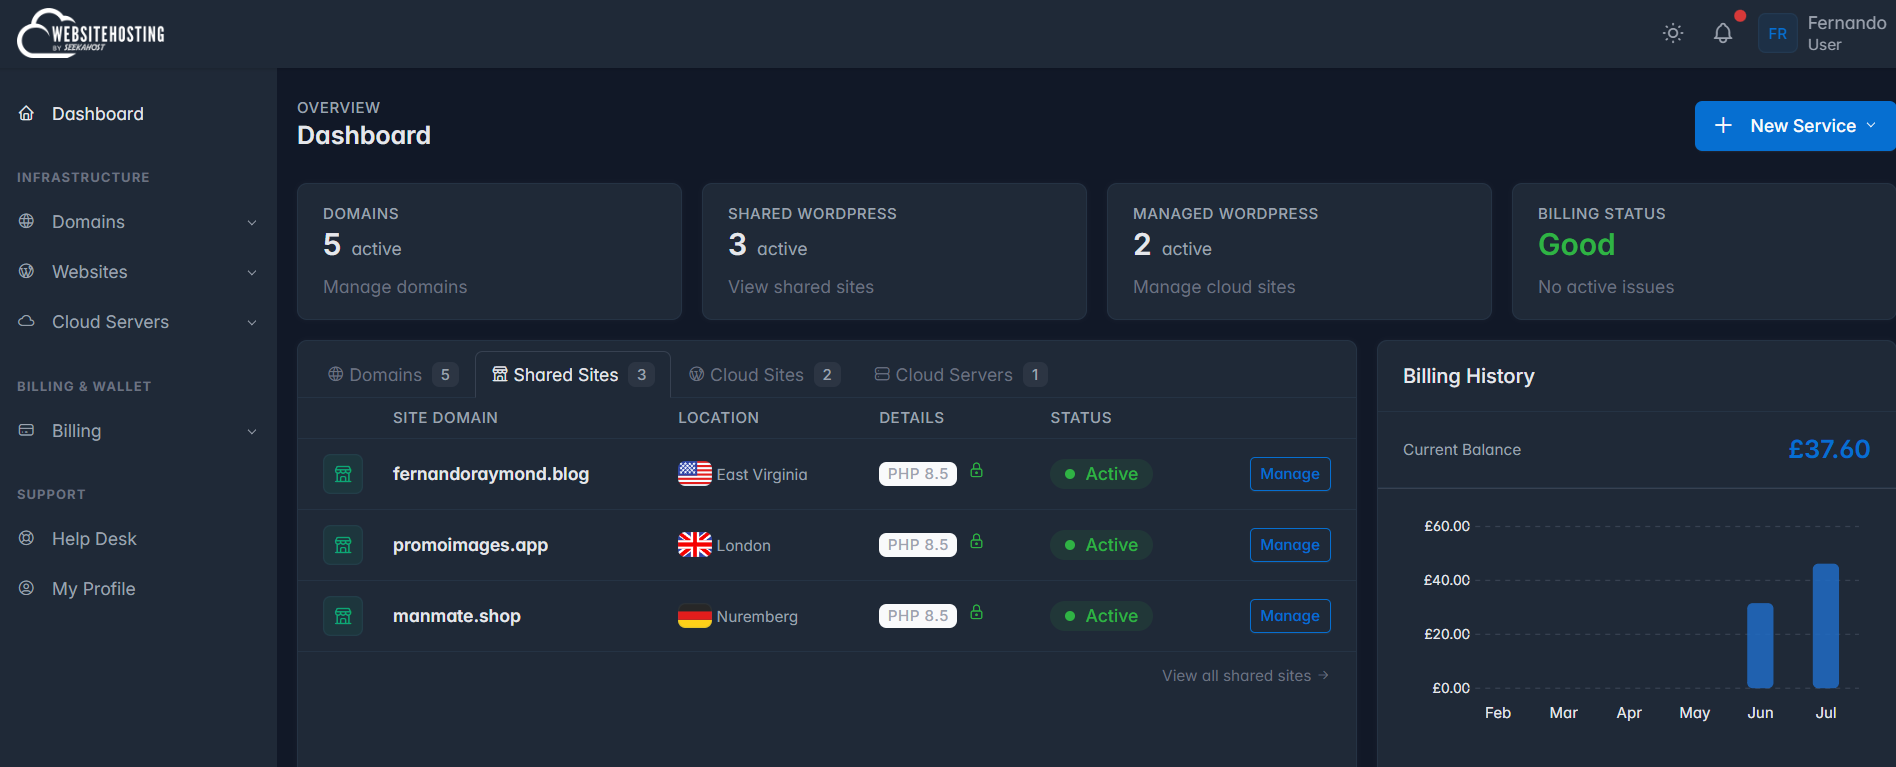
Across the top you get four summary cards: your active Domains, your active Shared WordPress sites, your Managed WordPress sites and your overall Billing Status. A green "Good" status means nothing needs your attention. Below that, a tabbed panel lists your sites and domains with a green Active pill and a Manage button on each row, and on the right you can watch your monthly hosting spend at a glance. That is the whole account in one screen.
2. Register your domain
Every WordPress site needs a domain name, so that is where we begin. From the left sidebar open Domains and choose Register New. You can also use the blue New Service button in the top right and pick Register Domain. Either route brings you to the same search page.
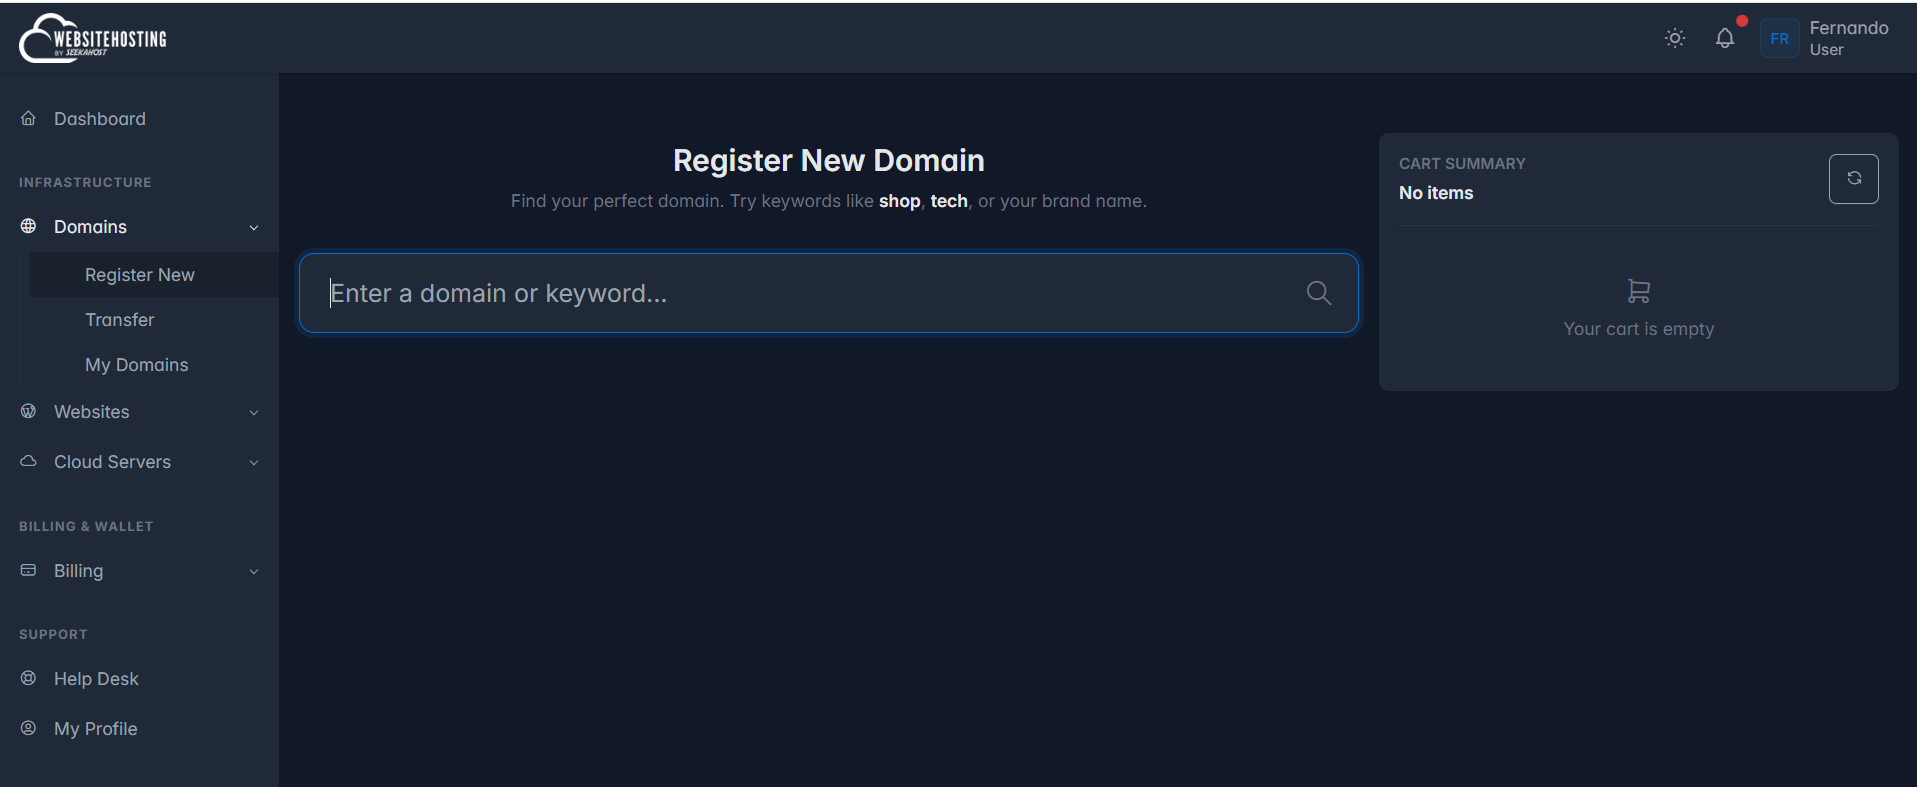
Type your brand name or a keyword into the search box and press search. Browse the results, add the domain you want to your cart, then review the Cart Summary panel on the right before you commit. When you are happy, head to checkout to complete the registration. If you already own a domain elsewhere, use Domains then Transfer instead, and the portal will walk you through unlocking it and pasting your EPP code.
Tip from experience: for a blog or business aiming at a global audience, I still recommend a .com wherever you can get it. It reads as trustworthy and it helps you long term.
3. Deploy your managed WordPress site
Now the fun part. Open Websites in the sidebar, choose Shared WordPress and click Deploy New Site. This is the flow that lets you launch a high performance WordPress site in minutes.
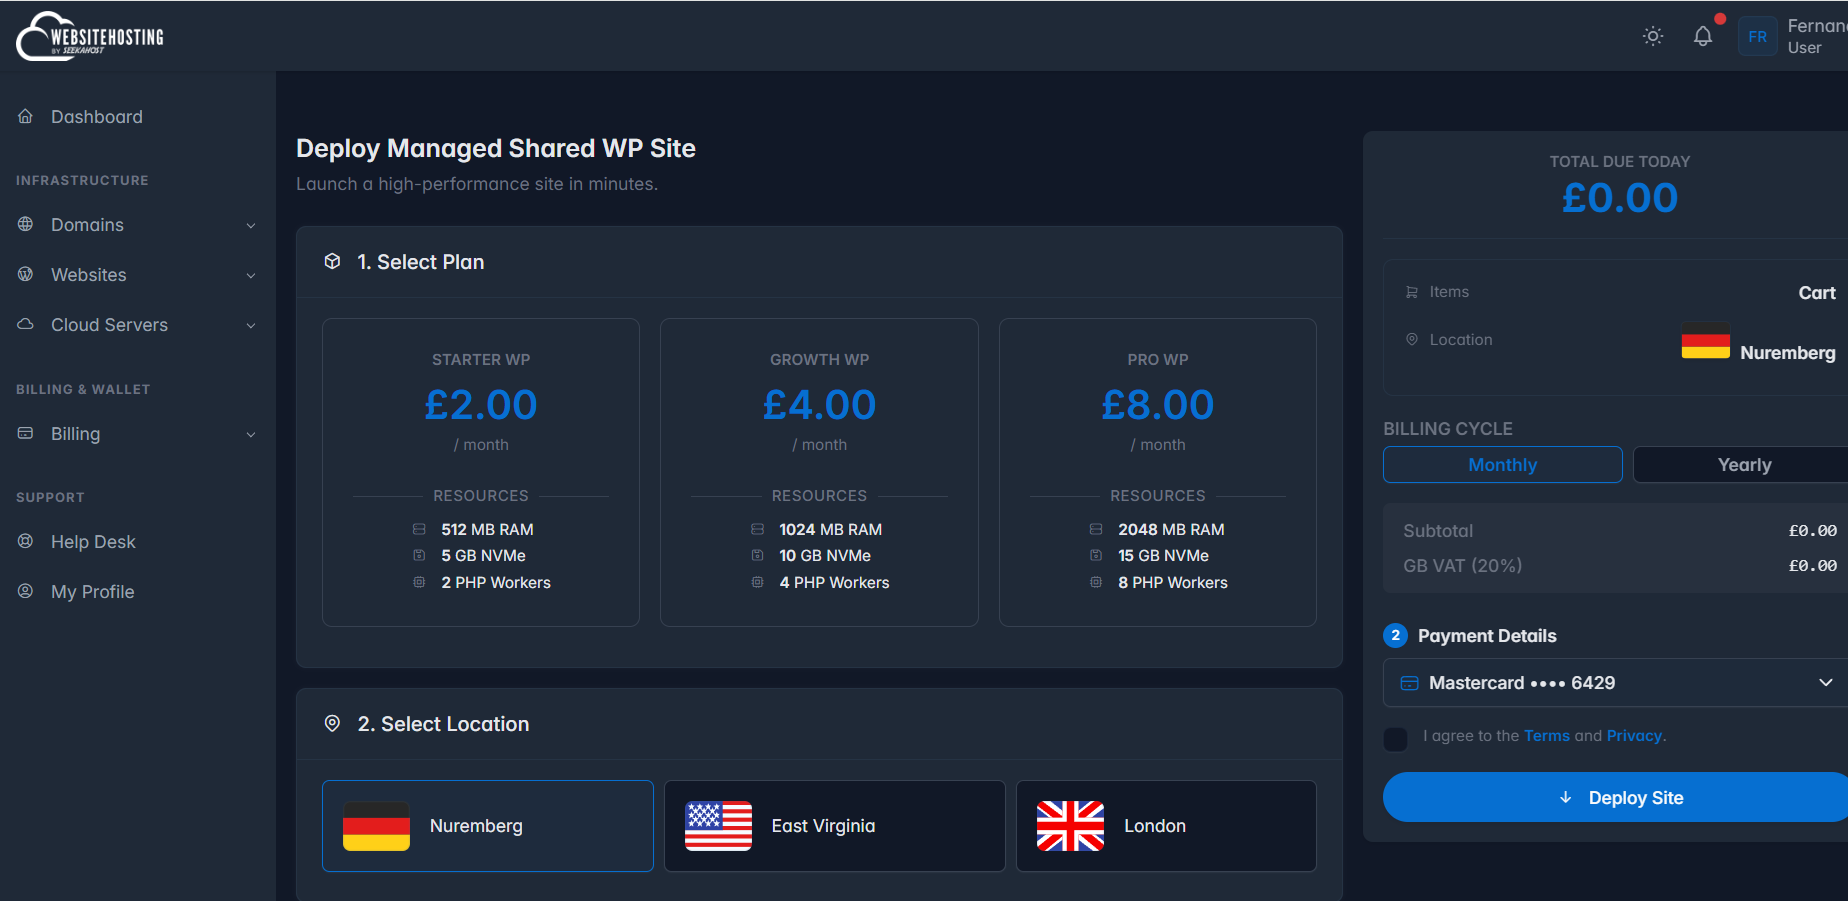
Step 1: choose your plan. There are three simple plans, and you can move up a tier later as your traffic grows.
Plan | Price per month | RAM | NVMe storage | PHP workers |
|---|---|---|---|---|
Starter WP | £2.00 | 512 MB | 5 GB | 2 |
Growth WP | £4.00 | 1024 MB | 10 GB | 4 |
Pro WP | £8.00 | 2048 MB | 15 GB | 8 |
Starter WP is plenty for a new blog or a small site. Growth WP suits a busier blog or a business site, and Pro WP is for higher traffic sites that need more memory and more concurrent PHP workers.
Step 2: choose your location. Pick the data centre closest to most of your visitors: Nuremberg in Germany, East Virginia in the USA or London in the UK. The closer the server sits to your audience, the faster your pages load for them, which matters for both readers and SEO.
Step 3: check out. The panel on the right keeps a running summary: your plan, your chosen location and a Monthly or Yearly billing toggle. The subtotal and GB VAT at 20 percent are itemised, and your saved card is already selected. Tick the Terms and Privacy box, click Deploy Site, and your managed WordPress site launches in minutes. WordPress is installed for you, so there is no manual setup to fight through.
4. Manage your live WordPress site
Once your site is live it appears under Websites then Shared WordPress, alongside any other sites on your account.
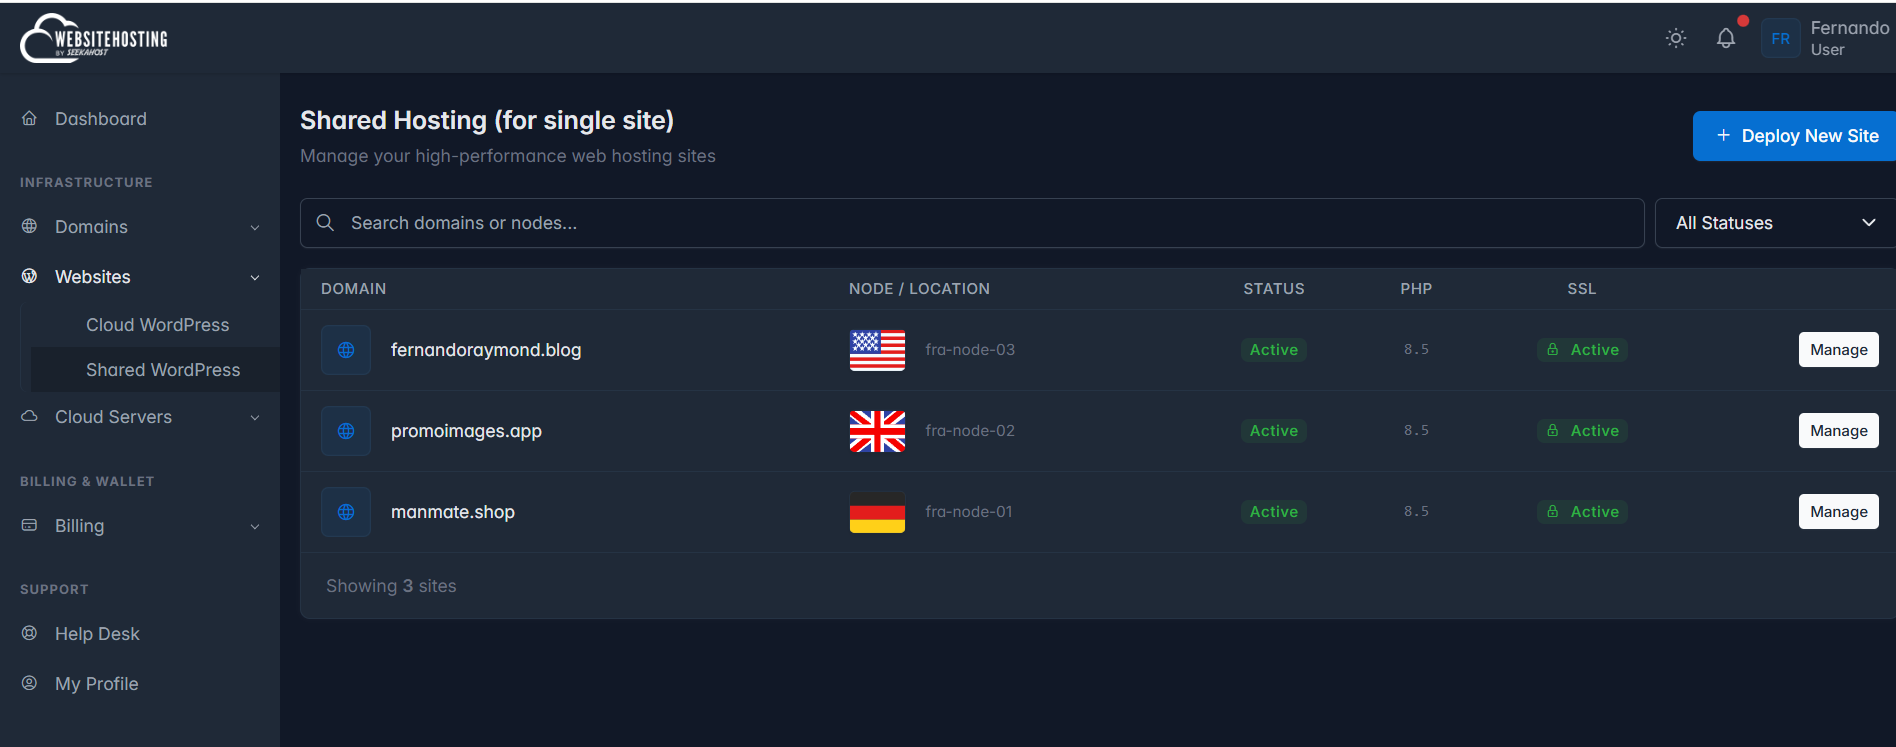
Each row shows the domain, the node and location it runs on, a green Active status, the PHP version and the SSL status. Click Manage on any site to reach its controls, log in to WordPress and start building. Free SSL keeps your site secure and SEO friendly from day one, and if you ever need a hand our Help Desk in the sidebar is one click away.
That is it, you are online
Four steps: log in, register your domain, deploy your WordPress site and manage it. That is the whole point of WebsiteHosting.app. I wanted a platform where anyone can go from an idea to a live WordPress site without needing to be a developer, and now you have seen how quickly it happens.
If you are new to all this and want the wider picture on getting a blog live and growing it, read my UK guide, How to Start a Blog and Make Money Blogging in the UK. And for more of my own tips on blogging and running an online business, you will find plenty over on my personal blog.
Ready to try it? Head to portal.websitehosting.app and host your first WordPress site today.
Author Profile

Fernando Raymond
Founder & CEO SeekaHost™ helping 100 million people get online with the most affordable domain names and web hosting services. Featured on Forbes, Entrepreneur, Reader Digest and many more publications.
Free SSL Certificates

Recent Posts
The 8 Things That Actually Matter in WordPress Hosting (and Why websitehosting.app Wins on All of Them)
The Managed WordPress Hosting Options in the UK Comapred to Kinsta, WP Engine and Cloudways
The Modern Tech Stack for Global Business Founders (Beyond Hosting)
Why your E-Store’s new Personal Digital Assistant is our N8N VPS Hosting
How to Use the Best WordPress Cache Plugin (WP Blink Cache) to Improve WordPress Speed for Better SEO
